
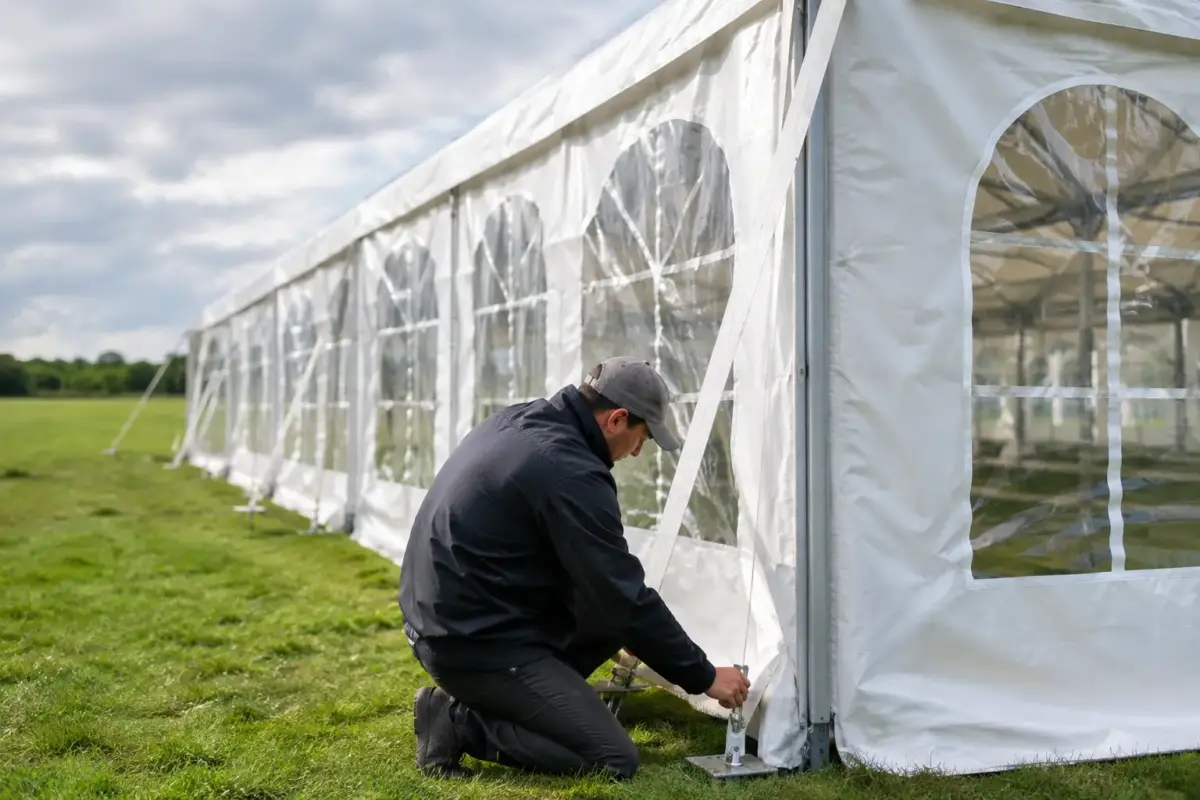
A marquee wall that starts flapping at a market, race meet or school event is not just distracting. It can load up the frame, pull at the roof fabric and turn a professional shelter into a safety issue. Knowing how to secure marquee walls properly means treating walls, tie-downs and site conditions as one system – not adding a panel after the marquee is already up.
For Australian operators, conditions can change fast. A calm morning can become a gusty afternoon, particularly on exposed ovals, foreshore sites, car parks and showgrounds. The right wall setup protects people, stock and your printed branding, while helping your marquee perform as the commercial-grade asset it is.
Start with a properly anchored marquee
Walls should only be fitted to a marquee that is already fully erected, locked into position and anchored at every leg. Do not use a wall to compensate for a light frame, missing pegs or insufficient weights. A wall catches wind. Once fitted, it can significantly increase the force applied to the structure.
Use a tie-down method suited to the surface. On grass or compacted ground, heavy-duty pegs and ratchet straps are usually the preferred starting point. Drive pegs at an angle away from the marquee, rather than straight down, and keep straps tensioned without crushing the frame or fabric. Check underground-service requirements and venue rules before pegging.
On concrete, bitumen, tiles or indoor floors, use purpose-built leg weights. Weight requirements depend on marquee size, frame grade, the number of walls installed and expected conditions. A small sandbag placed against a leg is not the same as a properly secured weight system. For exposed sites, combine suitable weights with approved straps where site conditions allow.
Never assume a stated wind rating applies to every configuration. Ratings depend on the specific marquee, correct anchoring, setup and conditions. Adding walls changes the way wind moves around the shelter, so use conservative judgement and follow the product instructions.
How to secure marquee walls at every attachment point
Most quality marquee walls attach using a combination of hook-and-loop strips, zips, clips or tabs, depending on the wall and frame design. The objective is simple: distribute the load across all intended attachment points, rather than leaving one corner or zip to do the work.
Fit the wall from the top down. Start by aligning the top edge cleanly with the valance or roof attachment, then work steadily towards each side. If your wall zips to an adjoining panel, engage the zip carefully from the top and run it all the way down. Forcing a misaligned zip can damage the teeth and leave a weak point where wind can get in.
Secure side straps, lower tabs and any frame clips once the top is in place. Keep the wall taut enough to avoid excessive movement, but do not over-tension it. Fabric pulled too tight can strain seams, distort printed graphics and make the zip harder to operate. A clean, firm fit is the target.
Before opening for business, walk the perimeter. Check that no hook-and-loop sections are folded over, no clips have missed the leg profile and no loose strap is rubbing on a sharp edge. This takes two minutes and can prevent damage that takes a marquee out of action for the rest of the season.
Match the wall to the frame and roof
Replacement walls need to suit the marquee’s dimensions, roof profile and attachment system. A wall that is nearly the right size is not close enough. It may leave gaps, drag on the ground or load the wrong part of the frame.
This matters particularly when mixing older equipment with newer commercial frames. Measure the side span, leg height and roof connection before ordering. If you are adding custom-printed walls, confirm artwork placement, door locations and whether the wall needs zips to connect with adjacent panels.
Manage airflow instead of boxing the marquee in
Four solid walls create maximum enclosure, but they also create the biggest wind-catching surface. In mild, settled weather, a fully enclosed marquee can make sense for privacy, weather protection, storage or a controlled activation space. In gusty conditions, it may be safer to reduce the wall area and allow airflow through the structure.
The best setup depends on the site. If wind is coming from one direction, use a solid wall on the windward side for protection, while leaving an exit path on the opposite side where practical. Half walls, doorway walls or walls with windows can provide customer separation and branding without closing off every side.
Avoid creating a large, sealed surface that faces directly into strong gusts. If a wall begins to billow hard, snap at the attachments or pull the marquee sideways, act early. Lower or remove the affected wall if it is safe to do so, then reassess the entire setup. Do not wait for fabric, zips or connectors to fail.
Keep entrances clear and walls out of traffic zones
A well-secured wall should not become a trip hazard. Make sure bottom straps are fastened close to the frame and excess webbing is tucked away. Doorway walls should open and close freely, with no stock, tables or display stands pressing against the zip.
At public events, consider how customers will move through the space. A crowded market stall needs a clear entry and exit, especially where prams, wheelchairs, trolleys or wet footwear are involved. If a wall creates a narrow bottleneck, reposition the counter or choose a more open wall configuration.
For sporting clubs, councils and community events, walls often carry sponsors, event messaging or directional graphics. Keep that branding visible by facing it towards the main approach, but do not sacrifice a safe orientation simply for exposure. A printed marquee works hardest when it stays standing, looks sharp and gives your team a usable working area.
Check walls throughout the event
Securing marquee walls is not a one-time setup task. Assign someone to inspect the structure when weather changes, after a rush of customers or when the site becomes wet and uneven. Check the roof, frame locks, anchors, weights, wall attachments and zips together.
Pay attention to movement at the legs. If a weight has shifted, a peg is loosening or a strap has gone slack, fix it immediately. Water can soften turf, and repeated gusts can work a peg free even when the setup looked solid at the start of the day.
If conditions become unsafe, stop trading or operating from the marquee and follow the event organiser’s weather procedures. No promotion, product display or queue of customers is worth pushing equipment beyond suitable conditions. Pack down walls first where safe, then reduce the structure in line with the manufacturer’s instructions.
Pack walls dry, clean and ready for the next job
At pack-down, brush off dirt and wipe away moisture before folding walls into their storage bag. If rain has made this impossible, unpack and dry them as soon as you return to your shed, office or clubrooms. Storing damp fabric can lead to mould, staining and unpleasant odours, particularly around hook-and-loop sections and zip seams.
Inspect for worn clips, frayed straps, damaged zips and torn attachment points before the next event. Replacing a small component early is cheaper than losing a wall or damaging a roof in the field. Keep spare parts with the marquee kit, along with the correct pegs, straps and weights, so your crew is never improvising on site.
A heavy-duty marquee wall is there to give your operation shelter, polish and stronger brand presence. Secure it to a correctly anchored frame, manage airflow intelligently and make weather checks part of the job. That is how a marquee keeps looking professional when the conditions are doing their best to test it.
