
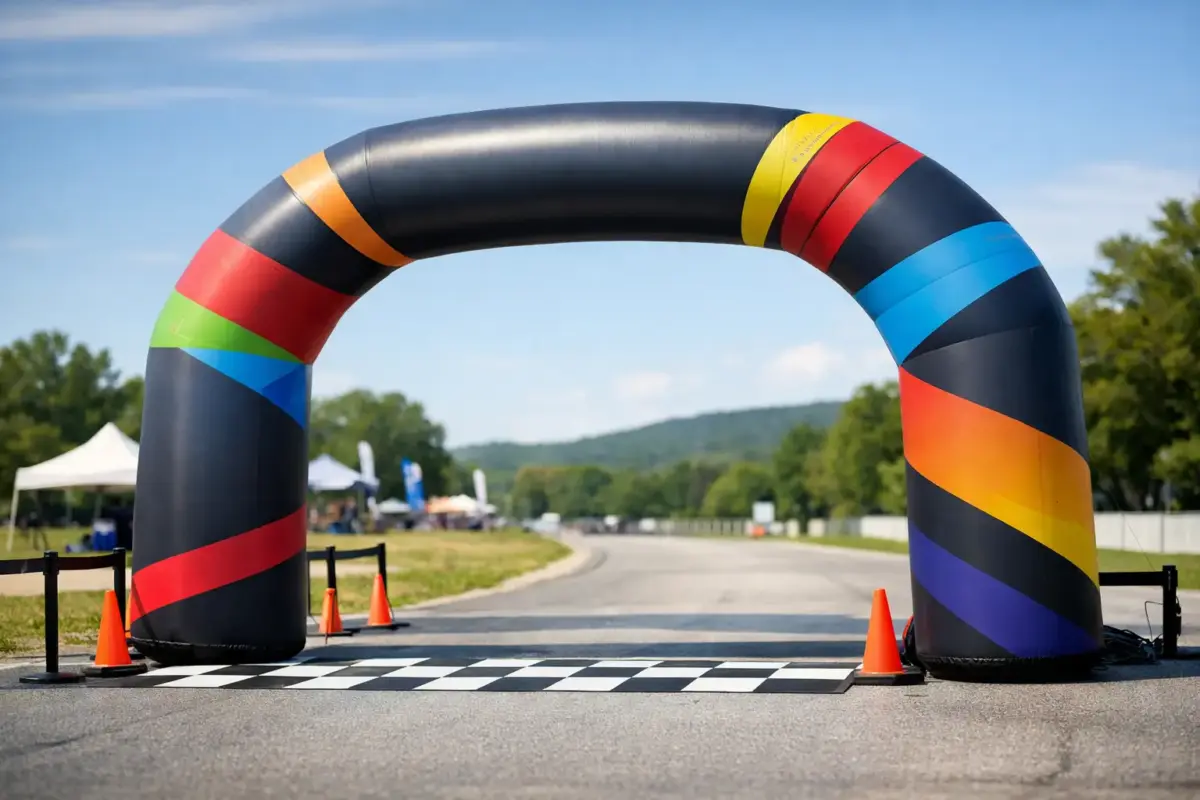
At 6 am on race day, the start and finish zone needs to look organised before the first competitor arrives. A branded inflatable finish line arch gives your event an unmistakable focal point – visible across an oval, park, car park or beachfront course, and ready to carry your sponsor, club or campaign branding from the first wave to pack-down.
For sporting clubs, councils, schools, charities and event operators, an inflatable arch is more than a photo backdrop. It establishes where the action is happening, frames the finish-line moment and puts your brand in every competitor photo, presentation shot and social post. When the structure is properly specified, printed and anchored, it becomes a hard-working event asset you can use season after season.
Why a branded inflatable finish line arch earns its place
A finish line is where the energy peaks. Runners push for the line, spectators gather, volunteers direct competitors and photographers wait for the shot. A plain set of bollards and tape may mark the course, but it does not create a recognisable event moment. A large printed arch does.
The strongest result comes from scale and contrast. Your event name needs to read clearly from a distance, while sponsor logos must remain legible without crowding the design. This is particularly valuable for fun runs, triathlons, cycling events, obstacle courses, school carnivals, motorsport activations and community festivals, where a finish-line photo can travel much further than the event site.
A branded arch can also work beyond the finish line. Use it as an entry gateway, start line, transition marker, checkpoint, sponsor zone or retail activation entrance. That flexibility matters when you are investing in custom-printed equipment rather than a one-off disposable sign.
Visibility is not the same as clutter
An arch offers a large print area, but filling every panel with logos weakens the message. From a distance, people should immediately see the event name, principal sponsor or campaign line. Secondary partners can sit on the legs or side panels, where they still receive strong exposure in close-up images.
Keep the main message high and centred. Use bold colours that suit your existing visual identity, and allow enough clear space around the lettering for it to read at speed. This is especially important on courses where participants approach from a long straight or where spectators are watching from behind barriers.
For recurring events, a more adaptable layout may be the better buy. A core arch branded to your organisation can be paired with removable banners, flags or corflute signs for year-specific sponsors. If the sponsor lineup changes every year, permanent logo-heavy printing can become restrictive.
Choosing the right inflatable arch for the site
The right size depends on who and what needs to pass beneath it. A fun run with a steady flow of pedestrians has different clearance requirements from a cycling event, vehicle launch or trade activation. Measure the course width, consider the height of the tallest expected user or equipment, and leave practical room for marshals, timing mats, barriers and emergency access.
An oversized arch can look impressive but become difficult to position in a tight street closure or school oval entrance. A smaller arch may suit a compact activation, but it can disappear in a large open park. The best choice is one that looks substantial in photographs while fitting the actual working area without squeezing competitors through a narrow channel.
Inflation method and operating time
Some inflatable arches use a continuous blower, while others are sealed after inflation. Each option has a place.
A continuous-air arch maintains its shape through an operating blower and is well suited to long event days where a consistent inflated form is required. It does, however, need access to power and sensible cable management. Generators can solve the power issue at remote locations, but they add noise, fuel and operational planning.
A sealed arch is inflated, closed and then operates without a blower running beside it. This can create a cleaner presentation and reduce reliance on a nearby power source. The trade-off is that it needs careful inflation, inspection and pressure checks throughout the event. Your supplier should clearly explain the inflation system, expected setup process and what is included.
Materials, seams and print quality matter
Outdoor event gear takes more punishment than showroom displays. It is dragged from trailers, packed into bags, set up on damp grass and exposed to UV, dust and wind. Look for quality fabric, reinforced construction, reliable valves or blower fittings, and printing that is built to hold colour rather than look tired after limited use.
Dye-sublimation printing is a strong option for custom fabric structures because the colour is integrated into the material rather than simply sitting on the surface. It produces a professional finish for detailed logos, gradients and full-colour artwork. That matters when your arch is the most photographed item on site.
Before production, ask for a visual mock-up. This is the point to check logo placement, spelling, sponsor hierarchy and colours against your brand guidelines. It is far easier to fix a layout on screen than after the arch has been printed.
Anchoring is part of the product, not an optional extra
A bright arch gets attention. A poorly secured arch gets the wrong kind of attention.
Inflatable structures must be anchored for the surface and weather conditions. On grass or soil, pegs and tie-down straps may be suitable where ground conditions allow. On hard surfaces such as bitumen, concrete or indoor floors, weighted anchors are generally required. The exact setup should account for the arch size, wind exposure, surface, public access and local event requirements.
Do not assume that calm conditions at setup will remain calm all day. Australian outdoor events can shift quickly, particularly on exposed ovals, foreshore sites and regional grounds. Build a weather plan into the event run sheet. Assign a team member to monitor conditions, check anchor points and make the call to deflate or remove the structure if conditions become unsafe.
Keep the arch clear of overhead powerlines, trees, sharp fencing and vehicle routes. Position cables away from pedestrian paths, cover them where needed and avoid creating a trip hazard near the finish chute. If a blower is in use, have a backup power plan and keep the unit protected from rain and accidental interference.
Build a finish zone, not just an arch
The arch is the headline, but surrounding equipment makes the zone work harder. Branded teardrop flags can guide competitors towards the finish from further down the course. Barricade banners help control flow and add sponsor exposure along the chute. A printed marquee gives timing crews, first aid teams, announcers or merchandise staff a protected working base.
For larger events, consider the competitor journey. Where do people enter the final straight? Where do they stop after crossing the line? Where are medals, water, recovery services and photography positioned? A finish arch should sit at the centre of a controlled, visible space – not simply be dropped onto the course at the last minute.
This approach also improves sponsor value. A partner logo on the arch is valuable, but it becomes more valuable when the brand appears consistently across flags, banners, media walls and presentation areas. The site looks deliberate, the event looks more professional and the photography delivers a stronger result.
Make setup repeatable for every event crew
A good inflatable arch should be simple enough for trained staff or volunteers to deploy without guesswork. The key is preparation. Pack the arch, blower or pump, ropes, pegs, weights, repair kit and instructions together. Label bags clearly and check the equipment after every event, not on the morning of the next one.
Use a short setup procedure that covers the essentials:
- inspect the fabric, seams, valves and print panels before inflation;
- inflate on a clean, clear surface and keep sharp objects away from the material;
- anchor every designated point before opening the zone to the public;
- recheck tension, weights and cables after the first period of use.
Pack-down deserves the same discipline. Allow the structure to dry before long-term storage wherever possible, brush off dirt and grass, and avoid forcing damp fabric into a tightly sealed bag. A clean, well-maintained arch will keep looking sharp and remain ready for the next race, roadshow or activation.
Turn the finish line into a stronger brand asset
The cheapest arch is not always the most economical option. If you run one annual fundraiser, a simple design may be all you need. If you manage a calendar of races, school events, council programs or sponsor activations, a quality custom structure can deliver value across dozens of uses.
Mountain Shade can help turn your event layout, logo files and sponsor requirements into a practical printed solution, with a free visual mock-up before production. Get the size, print layout and anchoring plan right, and your finish line will do more than mark the end of the course – it will give every participant a moment worth photographing.
